


Shopping cart
You have no items in your shopping cart.

____________________________________
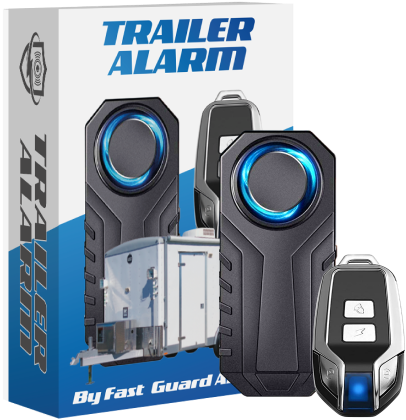
Tool trailers are essential assets for contractors, handymen, and various tradespeople. They carry valuable tools and equipment that are crucial for various jobs. However, these trailers are also susceptible to theft and unauthorized access. In this guide, we will walk you through the step-by-step process of installing a signaling device on your tool trailer. This device, often a vibration alarm system, adds an extra layer of security to your trailer and its contents. FastGuardAlarm.com offers effective solutions for protecting your assets, including signaling devices and catalytic converter alarms.
Tool trailers are appealing targets for thieves due to the valuable equipment they contain. Here are some reasons why installing a signaling device is crucial:
1. Asset Protection:
Protect your valuable tools and equipment from theft. Losing your tools can be a significant setback for your work and finances.
2. Deterrence:
Signaling devices act as deterrents. The audible alarm they produce when triggered can scare away potential thieves and vandals.
3. Peace of Mind:
With a signaling device, you'll have peace of mind knowing that your tools and trailer are secure, whether you're on-site or away.
Installing a signaling device on your tool trailer doesn't have to be complicated. Follow these steps:
Visit FastGuardAlarm.com to explore the available signaling device options. Consider factors like the size of your trailer and the level of security you require.
The placement of the signaling device is crucial. It should be installed where it can detect unauthorized access effectively. Common locations include the trailer door, windows, or inside compartments where valuable tools are stored.
You'll need basic tools for the installation, including a power drill, screws, and a screwdriver. Ensure you have everything you need before you start.
Follow the manufacturer's instructions for mounting the signaling device. Typically, you'll need to secure it using screws. Make sure it's securely attached to the trailer.
Most signaling devices require a power source. This can be a battery or a direct connection to your trailer's electrical system. Follow the device's wiring instructions to ensure it has power.
Before relying on the signaling device for security, test it to ensure it's functioning correctly. Trigger the alarm and verify that it produces the desired sound and alerts you effectively.
Some signaling devices offer remote monitoring features. If your device has this capability, follow the instructions to set up remote alerts on your smartphone or computer for added convenience.
Installing a signaling device on your tool trailer is a smart investment in the security of your valuable tools and equipment. With the help of FastGuardAlarm.com's effective solutions, you can protect your assets from theft and unauthorized access. Follow the installation steps carefully, and enjoy the peace of mind that comes with knowing your tools are safe and secure, whether you're on the job or away from the site.
Don't let the risk of theft and losses impact your work. Take proactive measures to safeguard your tools and trailer, and focus on what you do best—delivering high-quality craftsmanship and services to your clients.